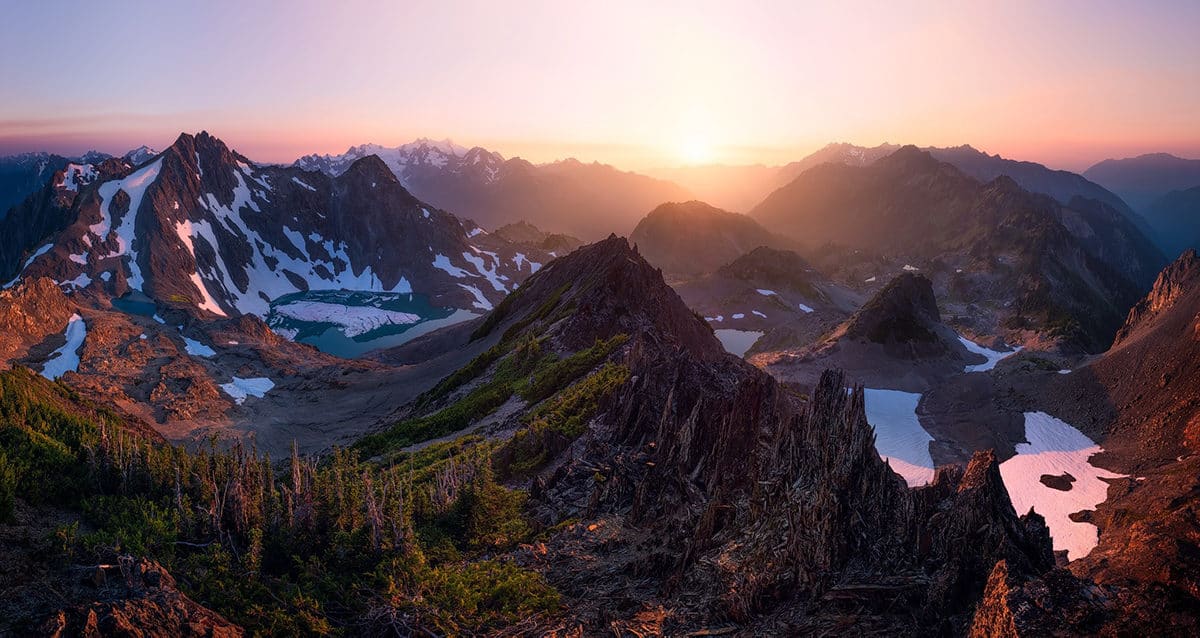
Mixing backpacking and photography together isn’t easy…
Learn the EXACT tips and strategies that I use as a full-time backcountry photographer.
Page Contents
- Backpacking Photography Tips & Gear Videos
- 1. Choose Lightweight Backpacking Gear
- 2. Don’t Buy a “Photography Backpack”
- 3. Best Camera Gear for Hiking
- 4. Learn How to Double the Life of Your Batteries
- 5. Don’t Think About Taking Photos While Hiking
- 6. Avoid Being a Weekend Warrior
- 7. Pick Strategic Camp Spots
- 8. Don’t be a Lazy Backpacker or Photographer
- 9. Find a Friend to Hike With That’s a Photographer
- 10. Master Your Camera Before Backpacking
- 11. Backpack Into Areas That Aren’t “Hotspots”
- 12. Choose Destinations Like a Pro
- 13. Use Google Earth for Planning
- Bonus #1: Don’t Fuel the Instagram Fire
- Bonus #2: Most Valuable Core Tip
- What do You Think?
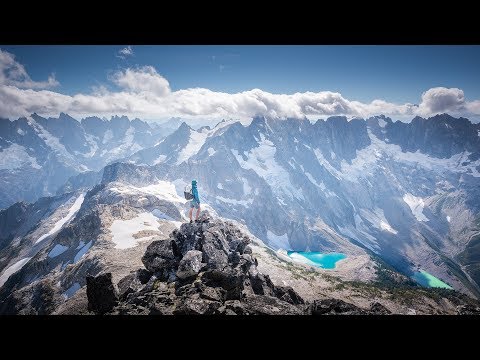
Backpacking Photography Tips & Gear Videos
Watch these videos before reading this guide.
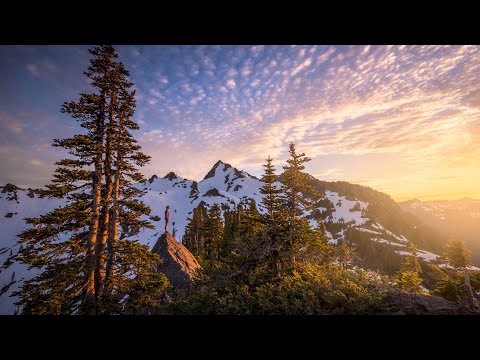
Learn about the photography gear that I personally bring into the backcountry.
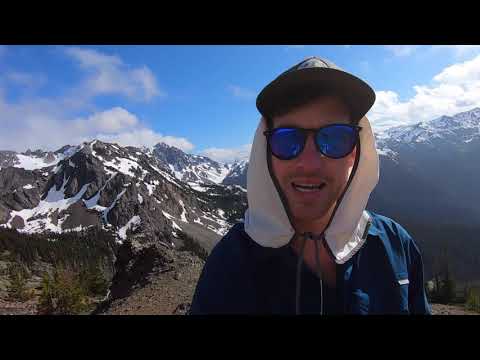
This video goes over the tips in this guide and MORE.
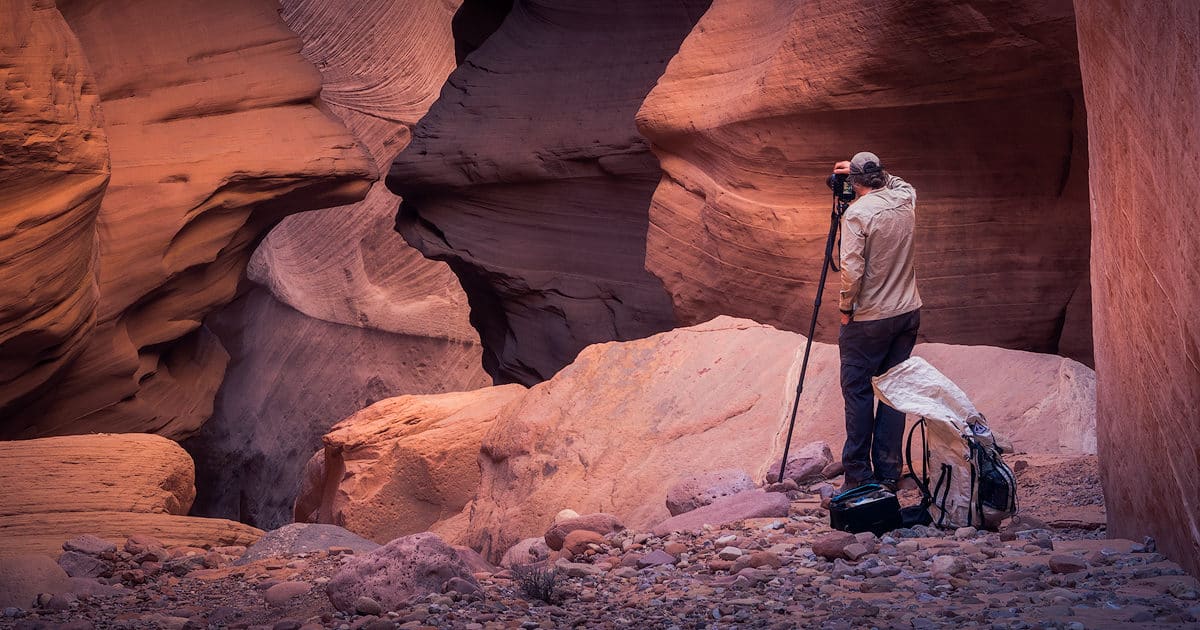
1. Choose Lightweight Backpacking Gear
Fact:
My photography gear comes out to about the same weight as all of my backpacking gear.
A LIGHT base weight enables you to:
- Carry more camera gear
- Have more energy to take photos
- Do longer trips
- Hike further
Be sure to check out my Ultralight Backpacking Tips Guide to learn more.
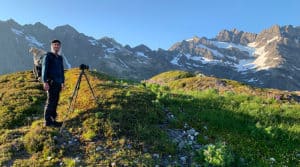
2. Don’t Buy a “Photography Backpack”
You would think that a camera bag specifically made for backpacking would be your best bet…
Reality:
You’re WAY better off carrying your photography gear in a camera case & lightweight backpacking bag.
I fell into this trap a few years back…
Decided to test out an F-Stop “Photography Backpack”.
It was heavy, uncomfortable, and had way too many unnecessary features.
These bags are mostly hype in my opinion.
Watch this video to learn more about my backpack of choice.
That said, I do LOVE my F-stop Pro ICU camera case.
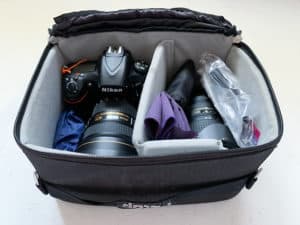
The size small fits all of my camera gear perfectly.
I always keep this case at the very top of my bag so I can access it easily.
Join the 1,000 + Member Backpacking Community 🙂
Emails are never shared. Unsubscribe at any time.
3. Best Camera Gear for Hiking
The goal is to come up with the LIGHTEST most minimal setup as possible.
And still be able to capture the photos that are most important to YOU.
This is what is most important to me:
• Being able to take high quality images
• Having a DEPENDABLE full frame camera
• I don’t wan’t to carry more than 2 lens’s
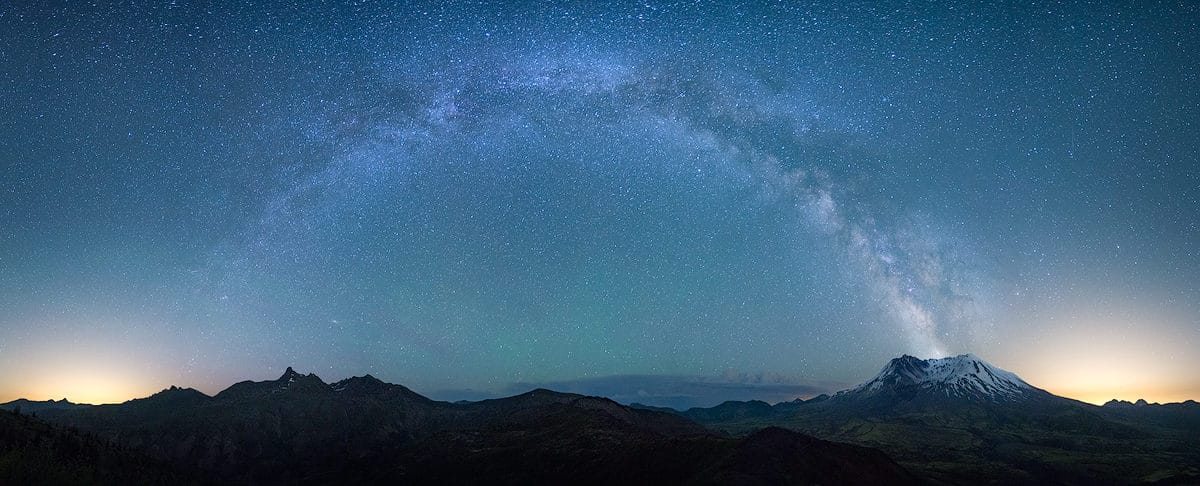
• I wan’t to be able to take photos of the night sky
The camera gear listed below is the BEST setup I could come up with:
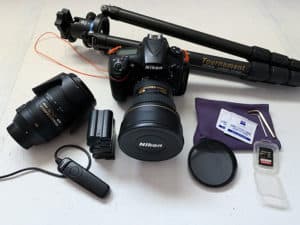
Camera: Nikon D850
I have been shooting with Nikon’s previous model of this camera (D810) for 2 1/2 years now.
I decided on this camera for 3 reasons:
1. It’s the most dependable full frame camera available.
2. It has an incredible sensor that allows me to take photos of the night sky.
3. Nikon has the best 2 lens combination out there.
Lens #1: Nikorr 14-24
This lens is known by many as the BEST wide angle lens ever produced.
The 2.8 aperture allows me to take high quality photos of the night sky.
Many of my ALL-TIME favorite images have been captured with this lens.
Lens #2: Nikorr 28-300
This is one of the lightest lenses available that covers this focal range.
The image stabilization is great for shooting photos of wildlife or hikers in action.
I currently shoot about 75% of my photos with this lens.
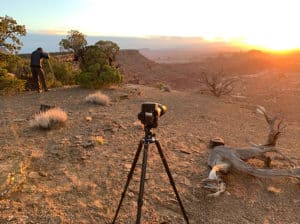
Tripod: Feisol CT-3442
Weighing only 2.3 pounds makes this one of the LIGHTEST carbon fiber tripods in its class.
It also costs about half the price of most comparable tripods.
Have taken mine into the backcountry for about 200 days now.
ZERO issues so far.
L Bracket: SUNWAYFOTO
Beyond worth the extra weight.
You can easily switch your camera between vertical & horizontal positions with an L Bracket.
Your camera is also a lot more stable in the vertical position since its sitting directly over the top of your tripod.
This is especially important while using a lightweight tripod.
Ball Head for Tripod: Benro IB1
This ball head is insanely sturdy for its weight.
It’s compatible with an L bracket.
Has a panning feature that makes capturing panoramic shots a breeze.
Also costs about 1/3 the price of most comparable ball heads.
Camera accessories I carry:
- Microfiber cloth
- Ziess wet lens cleaning wipes
- Extra memory card
- Remote shutter release
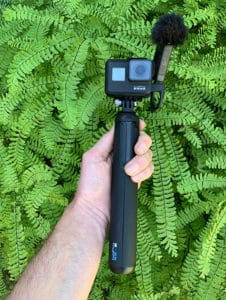
I also film all of my YouTube Videos in the backcountry with a GoPro Hero 7.
Always remember the BEST camera gear is the gear you have.
The quality of the gear itself is the least limiting factor in my opinion.
4. Learn How to Double the Life of Your Batteries
Carry half as many batteries by following these 5 steps:
1. Take the battery out of your camera while it’s not in use.
2. Compose your photos through the viewfinder with your camera turned OFF.
3. Only use the screen on your camera when you absolutely need to.
4. Turn the brightness of your screen down.
5. Keep your batteries insulated in cold temperatures.
Always carry slightly more batteries than you think you might need.
5. Don’t Think About Taking Photos While Hiking
It can be REALLY easy to get sucked into ALWAYS thinking about the photos you can take as you hike.
Examples of such thoughts:
- Constantly thinking about possible compositions
- Straining your eyes to find patterns
- Thinking about epic selfie opportunities
- Wondering if sunset is going to be a banger
This mental loop can be a HUGE downfall.
It pulls you away from the experience of nature & hiking itself.
Feel the wind, listen to the birds, FEEL the light.
You will know when to stop and take a photo.
This is NOT an easy practice.
Your best work will grow exponentially as you start to master the craft.
6. Avoid Being a Weekend Warrior
By that I mean go on longer backpacking trips if you can.
Now I know this isn’t always possible…
It’s taken me years of work and life building to be able to backpack over 100 days a year.
A longer trip enables you to:
- Connect with the area more
- Explore around for great compositions
- Increase your odds of getting some nice light
- Grow more as an artist and person
- Come back home with better photos
The MORE days the better.
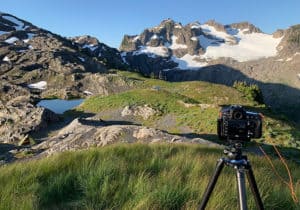
7. Pick Strategic Camp Spots
Many of my favorite photo’s were captured within a few 100′ of my tent.
If you want to photograph a landscape at sunrise or sunset this is especially nice.
You can sleep in later and you don’t have to hike in the dark to get back to camp.
This involves more work on the front end:
- Doing more research before your trip
- Possibly carrying more water to a dry camp
- Hiking all of your gear to a harder to reach destination
Always worth it in my experience.
Make sure you are setting up in an area that is permitted.
8. Don’t be a Lazy Backpacker or Photographer
95% of the time you will be happy you pushed yourself when you didn’t want to.
5 ways I personally try to push myself:
- Wake up early enough to photograph/experience sunrise
- Explore around from camp after being exhausted from hiking
- Make myself get out in below freezing or wet conditions
- Hiking further than expected to get to a strategic camp spot
- Stay up late to photograph the stars when I’m tired
Often I’ll go back to my tent after sunrise and catch the rest of my Z’s…
Ahhhhh!
I am officially that old.
9. Find a Friend to Hike With That’s a Photographer
This can be a challenge.
The number of photographers that are REALLY into backpacking is pretty small.
I never really reached out to anyone until a little over a year ago.
It was one of the BEST moves I ever made.
Heres my story:
I reached out to 2 backpacking photographers online that seemed to be on a similar page…
Person #1: Barefoot Jake
We immediately planned a trip into the Olympics.
We hit it off and have gone on a ton of trips since.
He has showed me the art of off-trail hiking.
Primarily learning how to navigate the land by animal trails.
Skirting around 100′ tall cliffs in the dense forest is often the name of the game.
We just got back from the wildest trip yet.
3 days of off-trail hiking brought us to one of the most remote drainages in the country.
We didn’t see another person for the entire 6 days we were out…
Person #2: Dave Morrow
A photographer that I have looked up to since 2013 when I started doing night sky photography.
We planned a trip together into the same Olympic river valley.
Only this time we would be exiting the valley on pack rafts. 40 miles out to the Pacific Ocean.
The trip was epic and we have spent a good 80 + days backpacking together since.
Dave’s taught me an INSANE amount of stuff:
- How to pack raft
- The value of creating a blog
- The importance of starting my YouTube channel
- Building my business
- Thinking more structurally and long term
In fact:
The only reason you are reading this right now is because of him.
It’s cool:
We inspire, motivate and learn from each other.
I’ve progressed more this past year than any other year of my life.
This works MUCH better with someone that has similar interests, goals and visions.
Something to think about before you reach out to anyone.
Be notified when I Release More Free Guides like this one 🙂
Emails are never shared. Unsubscribe at any time.
10. Master Your Camera Before Backpacking
Worst thing ever:
You hike to an AWESOME location.
Get some of those conditions that you talk about for years after…
Sky blowing up in every beautiful color imaginable, perfect rainbow above the mountain peak you’re photographing.
You get the shot.
STOKED!
You’re so excited about it that you bust through the door of your house on arrival.
Decide to swap the order of showering and uploading your photos to the computer.
And then…
You want to reevaluate your entire life after realizing you butchered the photo.
Too dramatic?
Says no one ever after experiencing this.
Iv’e been here.
It still hurts.
7 MOST important things to learn:
1. Learn EVERY button and feature on your camera. Should be able to use that thing with your eyes closed.
2. Make sure your photos are sharp and focused properly.
3. How to properly expose your photo. Don’t blow it on or out with the highlights.
4. Know when you need to take more than one photo to capture an entire dynamic range.
5. Understanding & using your histogram while shooting.
6. Depth of field, & shooting in aperture mode.
7. Make sure you are shooting RAW.
Once you are the MASTER of your camera you can focus purely on the creative side of photography.
Remember my friend Dave I mentioned earlier?
He has the BEST info out there about learning photography on his website.
11. Backpack Into Areas That Aren’t “Hotspots”
When I first started backpacking I would go online and search out the most epic places.
5 star or bust.
One by one I’d start checking them off the list…
Things have changed A LOT since I started backpacking.
The number of hikers in Washington State has doubled in the last 10 years.
Im actually pretty stoked about that.
I think this will have a net positive impact on our society.
That said, areas are becoming overcrowded.
To me, backpacking into an area with no or very few people is a FAR better experience.
LUCKILY:
There is a VAST area of wilderness out there that is almost untouched.
I have found that many of the most beautiful spots are off the radar.
You just have to put in a little more work to discover them.
Now let’s talk about the photography aspect.
Getting into an area that I have never seen a photograph of has been INCREDIBLY exciting.
The number of photographs from iconic places has been exponentially growing.
Fact:
Too much of anything repeated or copied tends to loose value.
I feel like I see a 100 pictures of Mt. Rainer every year as photographers flock there for the wildflowers.
Every Fall I brace myself for the wave of photos to come from the Enchantments.
Is there anything wrong with this? No of course not.
Create the art that makes you happy.
I have my fair share of photographs from hot spots I’ve been to in the past.
The best thing about being a photographer that backpacks?
It’s much easier to get into areas that few have been and photographed.
12. Choose Destinations Like a Pro
Something I see often…
Someone being SET on a specific destination weeks or months before their trip.
I find it best to make the final decision on location a day or 2 before my trip.
This allows me to adapt to weather and current conditions of the area.
I’m also trying to have the safest, most enjoyable trip possible.
Examples:
I’m not hiking the Washington coast if it’s going to be pouring down rain the entire trip.
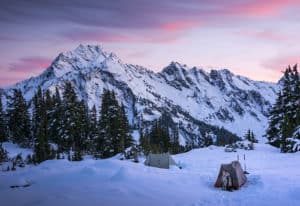
I’m also not going to head into the mountains late fall if there is a potential for me to get caught in a snow storm.
I try to target areas in their prime conditions.
Think:
- Peak wildflower blooms
- Perfect snow levels
- Potential for dramatic skies
- Peak fall colors
The timing of these conditions DEFINITELY varies depending on the year.
PRO TIP: Have a few backup hikes planned for changes in weather.
Backpacking into an area that has a limited amount of quota permits?
Only time I would recommend set planning ahead of time.
13. Use Google Earth for Planning
It’s unbelievable how detailed Google Earth is becoming.
This is an INCREDIBLE TOOL for pre visualizing potential photo opportunities.
Many picturesque tarns and tiny lakes aren’t printed on topographical maps.
You can also get a better feel for the view and surrounding mountain peaks of an area.
Google Earth is an incredibly tool for off-trail hiking.
Often topographical maps don’t reveal the FINE details.
Think:
- Small cliffs
- Potential water sources
- Elk trails
- Nice camp spots
I do my research on Google Earth at home using this 3 step method:
- I take screenshots of critical areas
- Transfer photos to my phone
- Transfer coordinates to my GAIA GPS phone app
When I’m out in the field I can use the info in real time.
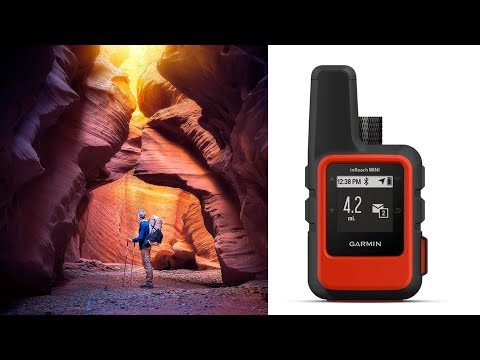
If you are hiking into remote areas I’d HIGHLY recommend having a Garmin inReach mini.
Bonus #1: Don’t Fuel the Instagram Fire
Sure tagging exact locations on Instagram can get you more likes.
It’s also having a TERRIBLE impact on the environment.
1,000 year old moss is being completely stripped away from rocks.
Areas that use to see a few people a month are being visited by hundreds in a weekend.
Unsustainable.
Some of those areas are being permanently shut down to the public.
I was on Instagram recently and came across an “Instagram Photographer” with a HUGE following…
He was advertising a FREE Ebook with info on the TOP 10 IG locations in the Olympics.
I almost threw up.
Of course all 10 locations were super short hikes with epic selfie opportunities.
I do like to give people an idea about the area I took a photograph still.
I use broad terms like “Olympic National Park” or “Pacific Northwest”.
Practice Digital Leave No Trace principles for anything you put out onto the internet.
Bonus #2: Most Valuable Core Tip
Learn how to have a deep appreciation for nature.
Photography should ALWAYS come second.
When we have a deep appreciation for something:
- We take care of it
- It takes care of us
The cycle repeats.
Awesome byproducts of this cycle?
- You will be happier
- The Earth will be happier
- You will keep becoming a better person
- BETTER photos will be a direct reflection
- You will inspire others to join the cycle
5 steps to fast track your appreciation:
1. Setting an intention – Hit the trail thinking “I love nature and care about it more than anything”.
2. Pick up garbage – See a candy bar wrapper on the trail? Pick it up. It feels good I promise.
3. Sit down in nature – For at least 5 minutes a day on your trip. While doing nothing. No talking, reading or eating.
Try to focus your thoughts and feelings on the area around you.
4. Follow LNT principles – That way your kids can have the same experience as you.
5. Backpack more – My favorite.
Unless you were taught these things growing up (I wasn’t), you are going to have to learn on your own.
I’m sure we all have a little bit of this inherently in our DNA…
That said, most of us have been desensitized to this growing up in a city.
Sure, this appreciation happens naturally while backpacking.
It can be a slow process though.
Being aware and practicing will speed things up quite a bit.
What do You Think?
Are you going to try any of these strategies on your next trip?
Any experienced backpacking photographers out there with any insight to add?
Drop a comment below.
Always stoked to hear from you.
MUCH Love and Happy Trails,
Iron
P.S. You can help support my work by picking up one of my Images of the Pacific Northwest calendars. 🙂
Survival television doesn’t help either. Harrison says it gives people the mistaken idea that wilderness survival skills are about learning to build a fire from scratch and saving yourself from starvation by eating bugs. “That’s primitive living and bush craft,” he says. “Carry a lighter wrapped in duct tape so it’s water proof and you have something to burn. And starvation isn’t even a concern in search and rescue. Even a lean person with 10 percent body fat has enough stores to live off for about a month.”
Wise words my friend!
I always have 2 mini lighters and a fold of duct tape in my kit.
Thanks for stopping by.
Finally made it over to your site and I’m really liking your perspectives on our backyard and the suggestions on how to enjoy it to the fullest. Keep up the great work Iron!
Thanks a ton Josh!
Super appreciate that and hope to cross paths in the Olympics sometime. 🙂
Thanks Iron! I always enjoy the information you share. Happy birthday a bit late! I am getting ready for some cool weather hiking/camping here in Tennessee.
Remember……it’s not the age, it’s the mileage. The mileage helps us not feel the age. At 64+ I try for 20 miles a day and feel great. I enjoy the skill set of 3 photo/camp/hiking individuals; you, Dave and Morton (Hilmer). Stay safe and follow the dream!
Hey Alan,
Thanks so much.
Glad you are enjoying the information.
Being on the trail at 64 is a life goal of mine! Way to still be out there.
Thanks again my friend. 🙂
Hi Iron,
Thanks for all the useful info you provide here and all the videos you share. I always look forward to seeing your latest adventures. Thanks for taking us along!
Have you ever tried hammock camping?
Happy Birthday!
Hey Ronald!
Thanks so very much.
I went on a 1 week backpacking trip in the Eagle Cap Wilderness with a backpacking hammock setup…
I didn’t sleep very well so I went back to sleeping on the ground.
I’ll still bring my hammock on shorter trips to relax in.
Thanks a ton for all of the awesome comments!
The digital leave no trace principals are everything! Thank you for highlighting this. It is so much more important for us to protect these areas than to receive attention online. 👏 👏
Trish!
I agree 100 percent.
I feel positive about the good change to come.