Wouldn’t it be awesome if you could lighten your backpack without buying any new gear?
Here’s the deal:
You can & it’s super EASY.
Learn the ultralight backpacking skills I use on the trail 100+ days a year.
Let’s dive right in.
Page Contents
- Ultralight Backpacking Tips Video
- 1. Disposable Water Bottle > Nalgene Bottle
- 2. Leave the Deodorant & Spare Undies Behind
- 3. Bring Lightweight Backpacking Food
- 4. Trim Down Keys & Wallet or Purse at Home
- 5. Only Carry 1-Liter of Water
- 6. Leave the Non-Essentials at Home
- 7. Multi-Use Gear is Your Best Friend
- 8. Share Gear With Your Hiking Partners
- 9. Give Stoveless Backpacking a Go
- 10. Check the Weather – Bring Appropriate Clothing Only
- 11. Repackage Consumable Items
- 12. Don’t Bring any Toilet Paper
- 13. Be an Ounce Counter
- BONUS – 6 Advanced Weight Cuts
- Don’t Go “Stupid Light”
- What do You Think?
Ultralight Backpacking Tips Video
This video goes over these tips & MORE. Watch this video before reading the guide.

1. Disposable Water Bottle > Nalgene Bottle
Ahhhh, the classic Nalgene bottle.
It’s got my sweet personalized stickers on it. I LOVE it. It’s like a part of me.
I have exactly 8 rings of duct tape wrapped around it. This bottle could save my life.
Fair enough…
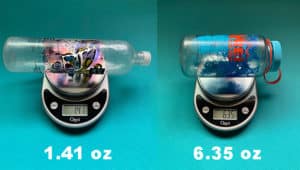
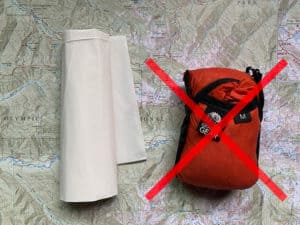
BUT, if you can Break that bottle bond, you can put 5 ounces in the bank by reusing a “Smartwater style” bottle.
Not only is a Smartwater bottle lighter.
It also has an ideal shape for holding & grabbing out of your backpack.
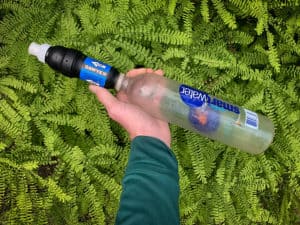
Plus, a Sawyer Squeeze filter can thread directly onto it.
BEST backpacking water bottle out there, in my opinion.
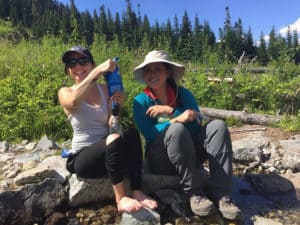
These 16 oz reusable water bottles are a little too small for a go-to water bottle.
They are great for holding adult beverages, though.
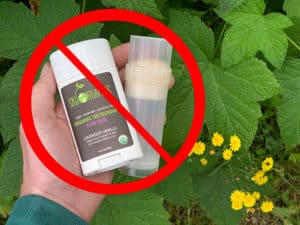
2. Leave the Deodorant & Spare Undies Behind
Facts:
- Deodorant can attract unwanted insects and bears
- Other hikers aren’t worried about how “fresh” you smell
Only planning on being out for a few days?
Leave the extra T-shirt & spare change of undies behind.
I NEVER carry extra duplicate layers of clothing to change into.
Even on a 2-week backpacking trip.
Try to wear clothes with antimicrobial properties.
ENJOY the scent you worked so hard for.
Join the 1,000 + Member Backpacking Community 🙂
Emails are never shared. Unsubscribe at any time.
3. Bring Lightweight Backpacking Food
By lightweight, I mean foods that have a HIGH caloric value.
I try to shoot for at least 100 calories per ounce for foods.
Foods with a high-fat content excel here.
Think:
- Nuts
- Butters
- Chocolate
- Oils
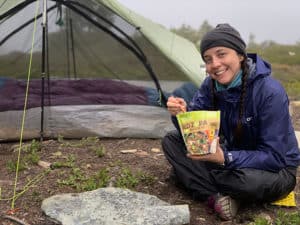
Dehydrated and freeze-dried meals are great for dinner.
My Best Backpacking Food Guide covers this topic extensively.
Outside of having the right food, strategic food planning comes next.
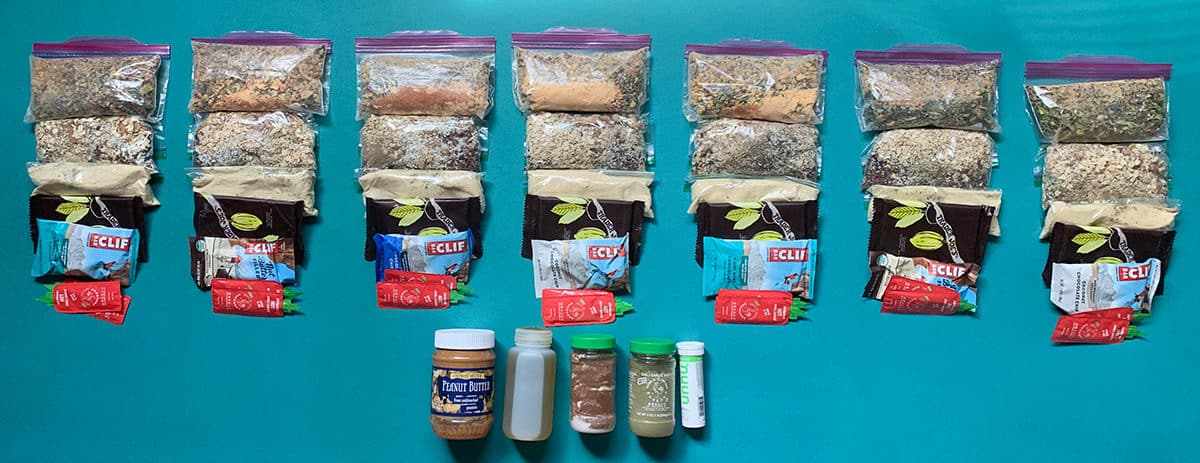
Whether I’m going on an overnight trip or a 10-day trip, I lay out every single day’s worth of food in advance.
This ensures that I don’t bring too much food on my trip.
4. Trim Down Keys & Wallet or Purse at Home
Often we jump into the car with our everyday wallet or purse and head out to the trailhead.
This leaves us in a sticky situation.
We are left with 2 options:
1. Take our important belongings on the trail.
2. Try to hide them in our car.
Trailheads are often hotspots for thieves.
Locking your wallet in the glove box or hiding your purse under the seat isn’t going to stop someone who just broke out your window.
Pro Move – Avoid this situation altogether.
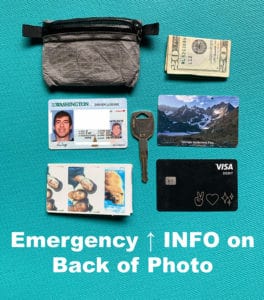
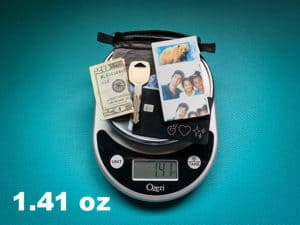
Just bring the essentials:
- Car key
- House key
- I.D.
- Debit or credit card
- Some cash
- emergency contact card
Throw this stuff in a ziplock bag or a lightweight wallet.
I like to carry a photo of me and someone I love and write my contact/emergency information on the back.
5. Only Carry 1-Liter of Water
So you bought a $400 lightweight tent to get your base weight down…
Then you hit the trail with 2-liters (4 pounds) of water.
I see this scenario play out all the time.
Over 90% of the time, I am never carrying more than 1-liter of water.
That’s a fact.
Water is HEAVY—about 2 pounds per liter.
Before any hike, I check my map.
I find reliable water sources (creeks, lakes, & rivers).
I only carry enough water to get me to the next source.
Exceptions:
- Hiking to a dry camp
- Hiking waterless stretches of 6 miles or more

Another thing I love to do. CAMEL UP at the water source.
Often I find myself chugging up to 1-liter of water at the source and leaving with less than 1/2 liter.
If your pee is too dark, drink more water.
Easy peasy.
6. Leave the Non-Essentials at Home
When I started backpacking, I thought I needed far more than I really did.
Outside of my first aid/repair kit, I use every item carried in my backpack on every trip.
New to backpacking?
After your trip, analyze everything you brought and see if there was a piece of gear you didn’t use.
Odds are, if you didn’t need it on that trip, you wouldn’t need it in the future.
Just make sure you always have your Backpacking Essentials.
7. Multi-Use Gear is Your Best Friend
Do you really need a steel mug & a pot?
A fork and a spoon?
My Jetboil serves as my stove, cup, and bowl.
A spoon is the only utensil I ever carry into the backcountry.
Sometimes you have to compromise here. I just stopped bringing my Kindle on the trail.
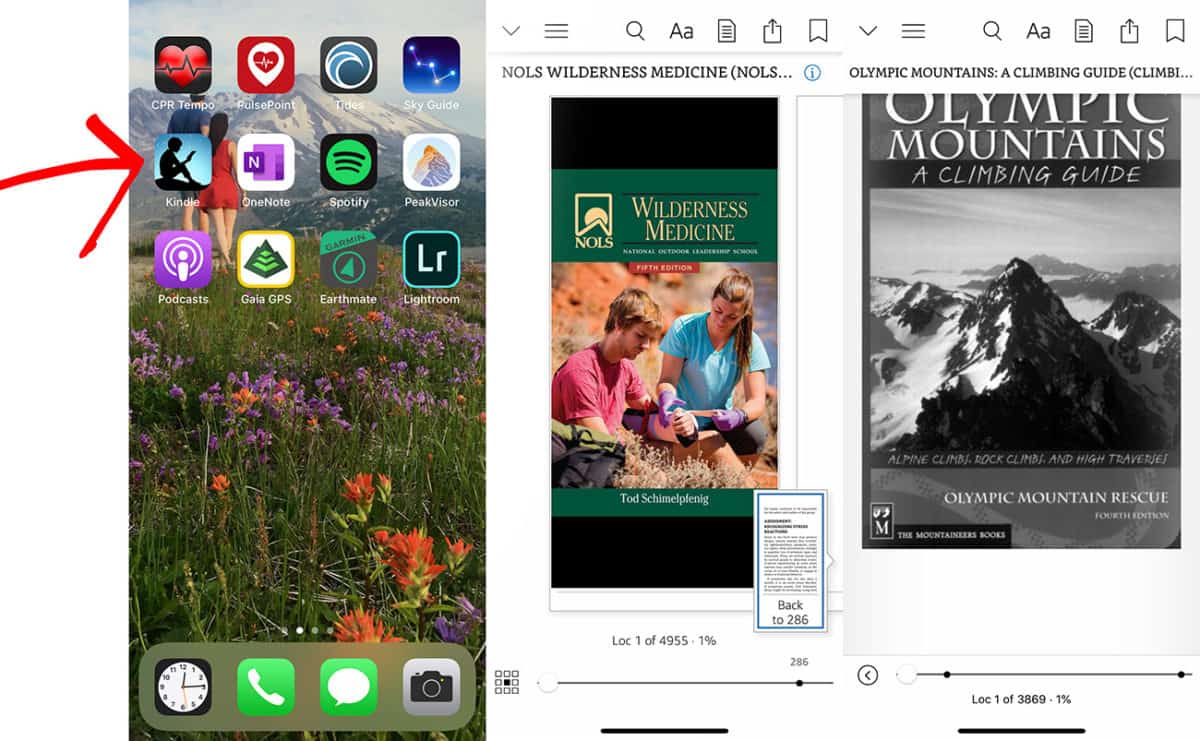
I started using the Kindle phone app instead.
Is it as good as the OG Kindle? Nope.
It’s good enough, though, and it’s definitely worth the weight savings to me.
Your dental floss can double as the thread for gear repair.
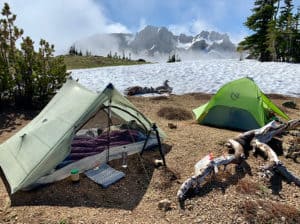
My trekking poles serve as my “tent poles” for my shelter.
Many hikers will use spare clothes as a pillow.
YOU can get pretty creative here.
Hiking with friends?
The odds are you don’t need 3 stoves on your trip.
My girlfriend just went on a trip with 2 of her girlfriends… I think I wrote that right.
They all shared a tent, a water filter, and a stove.
This enabled them to hike to a destination that they otherwise wouldn’t have been able to.
9. Give Stoveless Backpacking a Go
I LOVE stoveless backpacking when the right conditions present themselves.
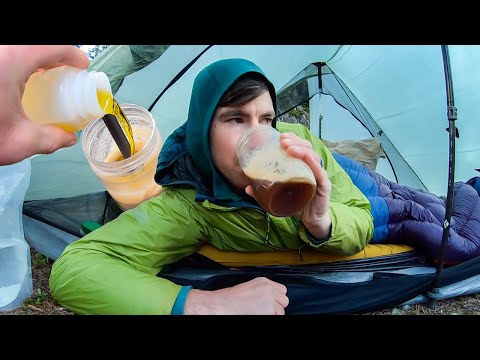
You can easily shave 1-2 pounds off your base weight by leaving the stove, fuel & pot behind.
I don’t always go stoveless, but when I’m REALLY trying to cut down on weight, I do.
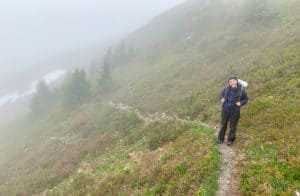
10. Check the Weather – Bring Appropriate Clothing Only
Before any trip, I check the weather.
If there is a chance of rain… I bring my rain gear!
No chance? Not a chance I’m bringing it.
Often we try to over-prepare here.
When I first started backpacking, I always brought “just in case” clothing layers.
I now have an extremely tried and true system. DEPENDING on the weather, I may leave a few layers behind.
I want to be very clear here:
Make sure you have the proper clothing for any weather you might encounter…
And NOTHING else.
11. Repackage Consumable Items
Do you really need to bring an entire roll of toilet paper on your trip?
An entire bottle of sunscreen?
Not on most trips in my experience.
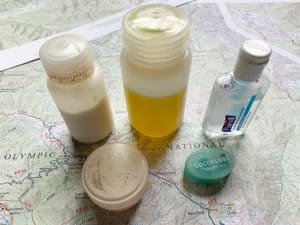
I use small reusable, lightweight containers or ziplock bags and only bring what I need.
This is a MUCH better option than continually buying travel-sized items.
Disposable Items I repackage:
- Toilet paper
- Hand sanitizer
- Toothpaste
- Sunscreen
- Floss
- Salt – Pepper – Seasonings
- Olive oil
- Coffee
12. Don’t Bring any Toilet Paper
Use natural materials instead.
Think:
- Smooth stones
- Leaves
- Snow (my favorite)
- Sticks (least favorite)
The first time I read about using a rock…
I had a similar reaction to the one you might be having.
It turns out smooth rocks work extremely well.
You can achieve the best results with snow, though.
Best way to use snow:
Pack a nice snowball patty and get to work.
Repeat the process until the new snowball is pure white for a “shower clean” experience.
The best thing about using natural materials is that you don’t have to pack out used toilet paper.
I know I said don’t bring any…
Unless you are very experienced here, you should bring some toilet paper just in case.
A few squares to finish up after using natural materials isn’t a bad idea either.
Oh ya, be careful with leaf selection. Watch out for Poison Oak.
13. Be an Ounce Counter
A little extra toothpaste might not sound like much…
But toothpaste is INSANELY heavy.
No, not really, but it’s all of the little things added up that make the BIG difference.
- Some extra toilet paper
- A Nalgene bottle
- An extra pair of underwear
- Too much food
These grams and ounces can add up to pounds.
Knowing the weights of all of your gear will help you make SMART decisions.
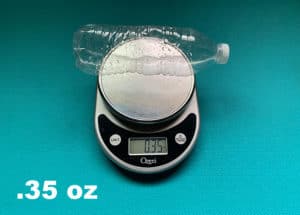
I own a small food scale (pictured multiple times in this guide) and weigh items that I can’t look up online.
Actually, I weigh everything on it.
Surprisingly, many of the weights I’ve looked up online have been wrong.
BONUS – 6 Advanced Weight Cuts
Some of these are a little more extreme.
Also, some of these weight cuts cost a little bit of money.
They are all under $20, so you won’t break the bank.
Use Mini Versions of Gear
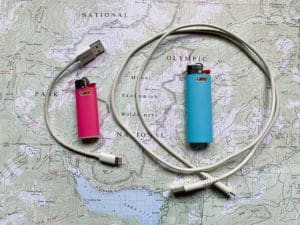
I’m always STOKED when I can find a miniature version of a piece of critical gear.
I carry a mini Bic lighter and a mini iPhone cord.
They weigh about half as much as their full-sized counterparts.
I actually carry 2 of each, so technically, I save no weight here.
BUT if I have a failure or misplace one, I’ve got a backup.
Cut the Handle off Your Toothbrush
You know they make those handles way longer than they need to be.
I did this when I hiked the Pacific Crest Trail.
I’m not this hardcore anymore & use a travel-sized toothbrush instead.
Get a Mini Swiss Army Knife
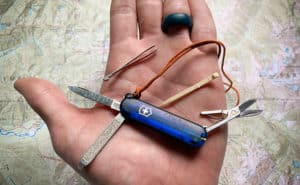
One piece of gear that I couldn’t recommend enough.
This knife only weighs .7 oz.
Plus, it’s got some extra handy features:
- Scissors
- File
- Tweezers
- Tooth pic
This is the only knife I ever carry into the backcountry unless I plan on starting a fire in very wet conditions.
Use a Trash Bag Instead of a Pack Cover
Not only is a trash compacter sack a MUCH more effective form of water protection…
It weighs FAR less than a bulky, ineffective pack cover.
Trash bags also cost a fraction of what a pack cover costs.
Insert the trash bag into your backpack and then fill it with gear.
Twist the top off & you’re good to go.
I REALLY want you to think about this:
A trash bag will 100% PROTECT your gear from full water submersions.
Cut Excess Straps off Your Backpack
Often backpacks are coddled with unnecessary straps.
If you never use such straps, get rid of them already.
I’ve cut entire pockets off of my backpacks in the past.
Careful, there’s no going back on this one.
Be the First to know When I Release New Guides & Videos 🙂
Emails are never shared. Unsubscribe at any time.
Dry out Gear Before Hiking
If you’ve made it this far, you know how heavy water is.
Let the dew dry off your tent before hiking out.
I carry a small multi-purpose microfiber cloth on my trips.
I use it to soak up the water that can’t be shaken off my tent.
Don’t Go “Stupid Light”
Going ultralight can be exciting and fun.
Even addictive for some.
But the second you decide to leave your map and compass behind because you have a GPS app on your phone…
YOU might be going “stupid light”.
Don’t learn the hard way here. Always bring the essentials.
I never used to carry a first aid kit because, well, I never used it.
NOT SMART.
I have smartened up a little bit and never go into the backcountry without it.
The number one goal with any trip is to make sure you make it on another. 🙂
What do You Think?
Have you tried any of these ultralight backpacking tips before? Maybe you have a favorite not listed above?
I would love to hear from you.
Drop a line below and let me know what you think.
Much Love and Happy Trails.
Iron Tazz
Hi there!
One of the ways I recently learned to save weight (should have been obvious) was a change of rope for my tarp, bear bag, etc. I always carried normal 7 strand paracord for everything – but it’s complete overkill. Single strand paracord weighs so much less and is still good for 100 lbs. A second way to save weight is to simplify flashlight gear. No more bulky blow-your-mind headlamps! Now I carry a little 1 AAA battery LED that tops out at 1 oz. Love it. Thanks for your helpful advice (-:
Hey Paul!
Thanks for the insight.
When I hiked the PCT I carried a single AAA battery flashlight that clipped to my hat.
LOVED it.
Happy Trails my friend!
Awesome guide. Have you ever added a coating/tape to the seams of your pack to waterproof it completely?
Thanks a ton Nick.
My backpack came seam taped but it’s not holding up like it use to.
I figure no matter how good you tape or seam seal your bag it will break down eventually.
Trash compactor sack is a full proof system. 🙂
Nice article! Baking soda is a good thing to bring on trail because it’s multipurpose and light – deodorant, toothpaste, ointment, electrolyte etc.
Never thought about ditching the toilet paper for smooth stones haha. But may have to try it out next time.
Thanks Tyler.
Super appreciate the feedback!
I can honestly say I didn’t know baking soda was an electrolyte.
That’s really good to know.
The smooth stones work much better than most would think.
Happy Trails.
That sounds like an awesome idea!
Thanks for the awesome comment!
Thanks Jerry
I follow L.N.T principles & bury the natural material with my waste.
You should always have the proper clothing for any weather you might encounter.
Thanks Michael!
The trash bag to keep your gear dry is a good idea…..but. The fabric on many packs will absorb sone if the water yor pack may be exposed to. Yes i know that generally a dyneema pack will not do this but not everyone csn speing for one of those. That being said….great ideas!
Thanks so much Chris
Two thoughts here:
1. If it’s raining hard enough you should have your gear protected in a trash compacter sack regardless of whether you have a pack cover or not.
2. The fabric of your backpack might soak up more weight in water than the weight of a pack cover. BUT how often would you be hiking in those conditions? The rest of the time you would still be carrying the weight of a pack cover that you are not using.
Maybe having both forms of protection would make the most sense If you planned on hiking in consistent rain.